Important Medical Disclaimer
This article is for informational purposes only and does not constitute medical advice. The information contained herein is not a substitute for, and should never be relied upon for, professional medical advice. Always seek the advice of your doctor or a qualified physical therapist with any questions you may have regarding a medical condition. Never disregard professional medical advice or delay in seeking it because of something you have read in this article.
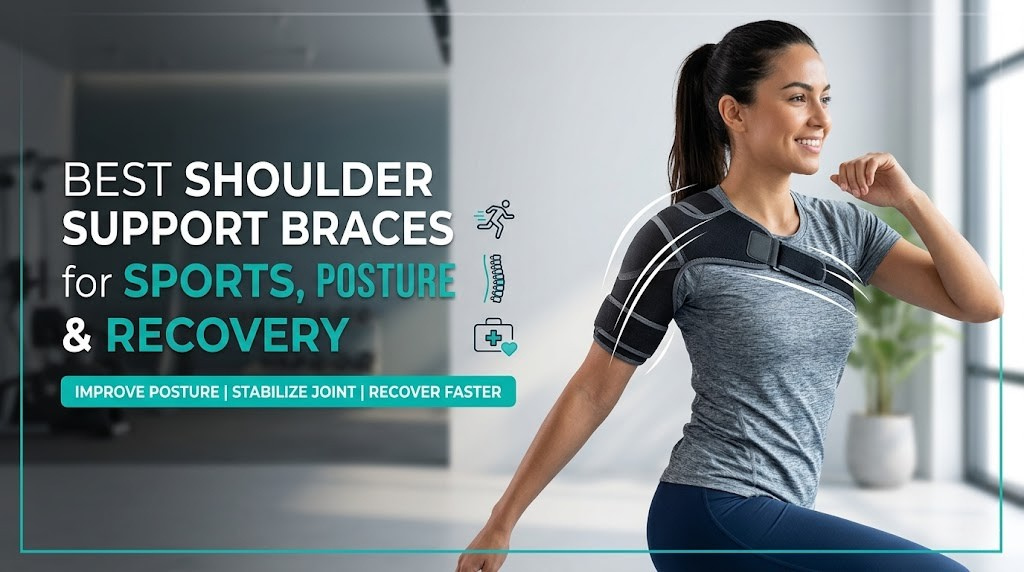
The Best Shoulder Braces for Support and Recovery
A shoulder injury—whether it’s a rotator cuff strain, tendonitis, AC joint sprain, or recovery from a dislocation—can be incredibly debilitating, limiting your ability to perform even simple daily tasks. During the healing process, a shoulder brace can be a crucial tool, providing stability, compression, and a physical reminder to avoid harmful movements.
As a fitness expert who has worked with many clients on their recovery journeys, I’ve seen firsthand how the right support can aid the healing process. This guide, created in consultation with physical therapy principles, will help you understand the different types of shoulder braces, explain the anatomy behind why they work, and review top-rated options so you can have an informed discussion with your healthcare provider.
📋 Table of Contents
- Understanding Shoulder Anatomy & Why Braces Help
- Common Shoulder Injuries That Benefit from Bracing
- How to Choose the Right Shoulder Brace
- Our Top Shoulder Brace Recommendations
- How to Properly Wear and Care for Your Brace
- Exercises to Do While Wearing a Shoulder Brace
- Complete Shoulder Recovery Guide
- When to See a Doctor
- Frequently Asked Questions
Understanding Shoulder Anatomy & Why Braces Help
Before choosing a brace, it helps to understand what you’re actually supporting. The shoulder is the most mobile joint in the entire human body — it can rotate in more directions than any other joint, which is exactly why it’s also the most commonly injured.
The shoulder is not a single joint but a complex of four separate joints working in harmony:
- Glenohumeral Joint: The classic “ball-and-socket” joint where the upper arm bone (humerus) meets the shallow socket of the shoulder blade (glenoid). This joint is responsible for the wide range of shoulder motion and is a common site of dislocation and rotator cuff injury.
- Acromioclavicular (AC) Joint: Where the collarbone (clavicle) meets the acromion, the bony tip of the shoulder blade. This is frequently injured in contact sports and falls — the classic “shoulder separation.”
- Sternoclavicular Joint: The joint connecting the collarbone to the sternum (breastbone). Injuries here are less common but can be serious.
- Scapulothoracic Joint: The sliding relationship between the shoulder blade and the ribcage. Proper scapular movement is essential for safe overhead activity.
Holding it all together is the rotator cuff, a group of four muscles and their tendons (supraspinatus, infraspinatus, teres minor, and subscapularis) that wrap around the shoulder joint. These muscles don’t just move the arm — they actively stabilize the humeral head within the socket during every single movement. When any part of this complex system is injured or weakened, the entire shoulder can become unstable, painful, and prone to further damage.
A shoulder brace works by providing the external stability that the injured muscles, tendons, and ligaments can no longer provide on their own. By compressing the joint and restricting certain planes of movement, a brace reduces the mechanical stress on healing tissues, decreases pain, and gives your body the protected environment it needs to rebuild. Think of it as temporary scaffolding for your shoulder while the permanent structural repairs are underway.
💡 Did You Know? Shoulder injuries account for roughly 20% of all sports-related injuries, and rotator cuff tears affect an estimated 2 million people in the United States every year. The right supportive gear combined with a consistent recovery routine can dramatically reduce your timeline back to full activity.
Common Shoulder Injuries That Benefit from Bracing
Different injuries require different levels of support. Understanding your specific condition will help you and your doctor identify which type of brace is appropriate. Here is a breakdown of the most common shoulder conditions managed with bracing.
Rotator Cuff Strain or Tear
This is the most common shoulder injury, particularly in adults over 40 and athletes who perform repetitive overhead motions (baseball pitchers, swimmers, tennis players). The supraspinatus tendon is the most frequently injured. Symptoms include a dull ache deep in the shoulder, weakness when lifting the arm, and pain that disturbs sleep.
Bracing goal: A moderate-support stabilizer brace that limits the range of motion and reduces the mechanical load on the damaged tendon. This prevents further tearing and allows the tendon to heal. If you’re focused on getting back into fitness during recovery, our guide on injury-modified training approaches can be very useful context.
Shoulder Dislocation and Instability
A shoulder dislocation occurs when the humeral head pops out of the glenoid socket, most commonly in an anterior (forward) direction. After a first dislocation, the shoulder is significantly more likely to dislocate again because the labrum (the cartilage ring that deepens the socket) and surrounding ligaments are stretched or torn. This condition is known as chronic shoulder instability.
Bracing goal: Prevent the arm from being placed in the vulnerable position (arm raised and rotated outward) while the soft tissue heals. Specialized stabilizer braces for dislocation often feature a hinged strap system that physically blocks this dangerous range of motion.
AC Joint Sprain (Shoulder Separation)
Often confused with a dislocation, a shoulder separation is actually an injury to the AC joint, not the glenohumeral joint. It typically happens from a fall onto the tip of the shoulder or an outstretched hand. Mild sprains (Grade I-II) respond well to conservative management with bracing and rest, while severe tears (Grade III+) may require surgery.
Bracing goal: Provide upward support to the outer end of the clavicle, reduce pain, and limit the arm movements that stress the AC joint.
Bursitis and Tendonitis
The shoulder contains several bursae — small fluid-filled sacs that cushion the joint. When these become inflamed (bursitis), or when the tendons of the rotator cuff become irritated and inflamed (tendonitis), the result is persistent, aching pain and restricted movement. These conditions are often caused by repetitive overhead activities, poor posture, or simply aging. They frequently coexist with each other.
Bracing goal: Mild compression to reduce inflammation, combined with gentle restriction of the most painful movements. A brace with a built-in hot/cold therapy pocket, like the NatraCure option reviewed below, is particularly effective for managing the inflammation associated with these conditions. Proper nutrition and vitamins also play a role in recovery — you might find our overview of vitamins that support tissue health and reduce brain fog from chronic pain interesting as complementary reading.
Frozen Shoulder (Adhesive Capsulitis)
Frozen shoulder develops when the capsule surrounding the shoulder joint thickens and tightens, severely restricting movement. It typically progresses through three stages: freezing (increasing pain and stiffness), frozen (stiffness dominates with less pain), and thawing (gradual return of motion). The entire process can take one to three years.
Bracing goal: Unlike most other conditions, frozen shoulder does NOT benefit from immobilization — in fact, restricting movement makes it worse. Bracing here is limited to pain management with mild compression during the most painful phase. Treatment is focused on physical therapy and gentle mobilization, not restriction.
Post-Surgical Recovery
Following rotator cuff repair, shoulder replacement, labrum repair (Bankart or SLAP repair), or AC joint reconstruction, your surgeon will prescribe a specific immobilizer or sling. These are maximum-support devices designed to protect the surgical repair while it heals. The type, duration of use, and weaning schedule will be entirely dictated by your surgical team. Do not attempt to choose a post-surgical brace independently.
🚨 Important: If your shoulder pain came on suddenly after a traumatic event (fall, collision, car accident), is accompanied by significant swelling, visible deformity, numbness, or you cannot move your arm at all, seek emergency medical care immediately. Do not attempt to manage a potentially fractured or dislocated shoulder with an over-the-counter brace. If you are recovering from a car accident, it’s also worth knowing your rights and safety considerations around physical recovery and vehicle use — our resource on safe driving habits during physical recovery addresses how injuries can affect driver fitness.
How to Choose the Right Shoulder Brace: A Complete Buyer’s Guide
The “best” brace is the one that’s right for your specific injury, body type, and activity level. Here’s what to consider after you’ve consulted your doctor.
1. Level of Support
- Mild Support (Compression Sleeves): These are best for general soreness, arthritis, tendonitis, or providing gentle compression during workouts. They offer minimal movement restriction and are often made from lightweight, breathable fabric. Ideal for people returning to activity and needing a proprioceptive reminder to protect the shoulder.
- Moderate Support (Stabilizer Braces): This is the most common category for everyday injuries. These braces use adjustable straps — typically a chest strap and an upper arm strap — to compress and partially restrict the shoulder’s range of motion. Ideal for rotator cuff strains, tendonitis, bursitis, and mild instability.
- Maximum Support (Immobilizers/Slings): Designed to prevent almost all shoulder movement. Used post-surgery, for fractures, and for severe dislocations. This type must be recommended and fitted by a medical professional. Wearing an immobilizer longer than prescribed can lead to joint contracture and muscle atrophy, which creates new long-term problems.
2. Key Features to Look For
- Material: Neoprene is the classic choice for its excellent compression and heat-retention properties, which can soothe muscles and promote blood flow. However, for extended wear (more than 1-2 hours), neoprene can trap heat and moisture. Look for braces that combine neoprene with mesh panels or use lighter neoprene blends to improve breathability.
- Adjustability: A good brace should have multiple adjustment points — at minimum, separate controls for the chest strap and the bicep/upper arm strap. This ensures a snug, secure fit that doesn’t slip during activity but doesn’t cut off circulation. Single-strap designs tend to slip; dual-strap designs provide far superior stability.
- Bilateral Design: Many braces are designed to be used on either the left or right shoulder, offering better value and versatility. This is achieved through a universal strap configuration. Always confirm a brace is bilateral (or that you’re buying the correct side) before purchasing.
- Hot/Cold Therapy Pocket: Some braces include a dedicated pocket for an ice pack or heat pack, allowing you to combine the benefits of bracing with thermal therapy. Cold therapy reduces acute inflammation; heat soothes chronic stiffness. This feature can be especially valuable in the first two weeks after an injury.
- Profile and Concealability: If you intend to wear your brace to work or in public, consider how low-profile it is. Some braces can be worn under clothing; others are bulkier and more visible.
- Ease of Donning: Can you put it on by yourself? This is a practical but often overlooked consideration, especially if your injury significantly limits your range of motion. The best brace is one you’ll actually wear consistently. Look for step-in or pull-over designs if solo application is a concern.
3. Sizing and Fit
A poorly fitted brace is worse than no brace. Too loose, and it will slide around and provide no meaningful support. Too tight, and it can restrict blood flow, cause nerve impingement, and create new problems. Always follow the manufacturer’s sizing chart, which is typically based on chest circumference for shoulder braces. When in doubt, size up — most braces can be tightened but not loosened beyond their design limits.
Signs your brace fits correctly:
- Secure and snug without causing numbness, tingling, or discoloration of the arm
- Doesn’t slide down the arm or bunch up in the armpit during normal movement
- The shoulder joint feels genuinely supported and stabilized, not just covered
- No skin pinching at the edges after 15-20 minutes of wear
Quick Comparison: Brace Type by Injury
| Injury/Condition | Recommended Brace Type | Support Level | Key Feature Needed |
|---|---|---|---|
| Rotator Cuff Strain (Mild–Moderate) | Stabilizer Brace | Moderate | Adjustable compression straps |
| Rotator Cuff Tear (Severe/Post-Op) | Immobilizer Sling (Rx only) | Maximum | Prescribed by surgeon |
| Shoulder Dislocation (Post-Reduction) | Stabilizer / Immobilizer | Moderate–Maximum | Blocks external rotation |
| AC Joint Sprain (Grade I–II) | Stabilizer Brace | Moderate | AC joint compression pad |
| Bursitis / Tendonitis | Stabilizer or Compression Sleeve | Mild–Moderate | Hot/cold therapy pocket |
| Frozen Shoulder | Mild Compression Sleeve (pain phase only) | Mild | Warmth/compression only |
| General Soreness / Arthritis | Compression Sleeve | Mild | Breathability and comfort |
| Post-Surgical Recovery | Prescribed Immobilizer | Maximum | Physician-directed only |
Our Top Shoulder Brace Recommendations
Here are some of the most popular and effective shoulder braces on the market, categorized by their primary use case. Each has been evaluated on support quality, adjustability, comfort during extended wear, durability, and overall value.

1. Babo Care Brace — Best Overall Stabilizer
The Babo Care shoulder brace is a top seller for a reason. It hits the sweet spot of providing robust, adjustable support without being overly bulky. It’s an excellent choice for individuals dealing with common issues like rotator cuff tears, bursitis, and general instability, and it works equally well for active recovery and daily wear.
| Support Level | Moderate to Strong |
|---|---|
| Material | Neoprene |
| Key Feature | Highly adjustable chest and arm straps |
| Bilateral | Yes (Fits Left or Right) |
| Best For | Rotator cuff injuries, general instability, daily wear |
The design allows for highly customized compression. You can tighten the straps to firmly secure the shoulder joint, which helps to reduce pain and prevent re-injury during the healing phase. The dual-strap system — one around the chest and one around the upper arm — creates a dynamic anchor that prevents the brace from riding up during activity, which is a common frustration with single-strap competitors. It strikes an excellent balance between stability and usability for daily activities.
The neoprene construction generates therapeutic warmth around the shoulder, which helps to loosen stiff muscles before exercise — a genuinely useful feature for anyone following a physical therapy protocol. Speaking of PT, if you’re working on rebuilding shoulder strength, pairing this brace with targeted exercises (outlined below) will significantly accelerate your results.
Pros
- Excellent, secure dual-strap adjustability
- Provides noticeable stability and pain relief
- Durable construction that holds up to daily use
- Can be worn under or over clothing
- Unisex and fits either shoulder
- Widely available and competitively priced
Cons
- Can be tricky to put on alone initially (a learning curve of 2–3 attempts)
- Neoprene may get warm during extended wear in hot climates
- Sizing can run slightly small — measure carefully and consider sizing up
Bottom Line: The Babo Care is the best all-purpose shoulder stabilizer for most people with common shoulder injuries. It’s our top recommendation for anyone starting out with a shoulder brace.
Check Price on Amazon
2. NatraCure Brace — Best for Pain & Inflammation Relief
The NatraCure brace stands out by integrating a core recovery principle directly into its design: targeted hot and cold therapy. It includes a microwaveable and freezable gel pack that fits snugly into a dedicated pocket positioned directly over the shoulder joint, allowing you to simultaneously support the joint and treat the underlying inflammation.
| Support Level | Mild to Moderate |
|---|---|
| Material | Neoprene Blend |
| Key Feature | Built-in pocket for included hot/cold gel pack |
| Bilateral | Yes (Fits Left or Right) |
| Best For | Bursitis, tendonitis, post-workout soreness, arthritis |
This is an incredibly efficient solution for managing the symptoms of tendonitis, bursitis, or post-workout soreness. Applying cold therapy in the first 48–72 hours after an acute injury can reduce swelling and numb pain. After that initial acute phase, switching to heat can help soothe chronically stiff and painful muscles. This all-in-one approach simplifies the recovery process and means you don’t have to juggle a separate ice pack while wearing your brace.
Pros
- Combines joint support with targeted thermal therapy
- Includes a high-quality, reusable gel pack
- Excellent for managing swelling and chronic stiffness
- Comfortable, adjustable fit for extended sessions
- Simplifies the recovery routine into one step
Cons
- Offers slightly less structural stability than dedicated stabilizers
- Noticeably bulkier when the gel pack is inserted
- Gel pack needs time to re-freeze or reheat between sessions
Bottom Line: If inflammation and pain management are your primary goals — particularly for bursitis or tendonitis — the NatraCure is the smarter choice. The built-in therapy integration is genuinely useful and adds real value over a standard brace.
Check Price on AmazonHow to Properly Wear and Care for Your Shoulder Brace
A shoulder brace is only as good as how well you use and maintain it. Improper fit or poor hygiene can undermine the benefits entirely and even create new problems.
Step-by-Step: Putting On a Shoulder Stabilizer Brace Alone
One of the most common complaints about shoulder braces is difficulty self-application, especially when the injured shoulder has limited range of motion. Here’s the method most people find easiest:
- Loosen all straps fully before you begin. Trying to put on a partially tightened brace adds unnecessary complexity.
- Slip your injured arm through the arm sleeve or loop first. Position the main body of the brace over the shoulder joint.
- Reach the chest strap around your back and secure it in front. This is the hardest step — use a mirror or ask for help initially.
- Secure the upper arm strap with your good hand, ensuring the brace sits directly over the shoulder joint, not sliding up or down.
- Adjust both straps to your desired compression level. The brace should feel snug and stable but not painful or circulation-restricting.
- Check circulation: Wiggle your fingers. If they feel numb, tingly, or look discolored, loosen the straps immediately.
Within a week of consistent use, most people find they can apply their brace independently in under 60 seconds. The learning curve is real but short.
How Long Should You Wear It Each Day?
Your doctor or physical therapist should provide specific guidance for your condition. As a general framework:
- Acute phase (Days 1–7 post-injury): Wear during all waking hours and any activity, unless sleeping. Remove for showering and skin checks.
- Sub-acute phase (Weeks 2–6): Wear during activities that stress the shoulder. Progressive weaning as strength returns under PT guidance.
- Recovery/Return to Sport: Wear during sport or heavy activity only. The goal is to no longer need the brace for daily life.
Over-reliance on your brace is a real risk. When the brace is doing the stabilizing work, your rotator cuff muscles don’t have to — and if they’re not working, they’re getting weaker. This is why bracing should always be paired with a strengthening program. Think of the brace as a training wheel, not a permanent solution.
Caring for and Cleaning Your Brace
A brace worn against the skin accumulates sweat, dead skin cells, and bacteria. Regular cleaning is essential for skin health, brace longevity, and hygiene:
- Frequency: Clean your brace every 2–3 days of use, or daily if you sweat heavily.
- Method: Most neoprene braces can be hand-washed with mild soap and lukewarm water. Gently squeeze rather than wring. Avoid hot water, which can degrade neoprene.
- Drying: Air dry completely in a well-ventilated area, away from direct sunlight and heat sources. Never put a neoprene brace in the dryer — the heat will break down the material and cause it to stiffen and crack.
- Storage: Store flat or loosely rolled, not compressed, to maintain the brace’s shape and elasticity over time.
Exercises to Do While Wearing a Shoulder Brace (and After)
A brace protects your shoulder — but exercises rebuild it. The goal of any shoulder recovery program is to progressively wean off the brace as your muscles grow strong enough to provide their own stability. The following exercises are commonly used in physical therapy protocols, but always confirm with your PT or doctor which are appropriate for your specific injury and stage of recovery before beginning.
Phase 1: Gentle Range-of-Motion (Acute Phase)
These movements are designed to maintain joint mobility and prevent stiffness while the brace is providing most of the structural support. They should feel gentle — zero to minimal pain.
- Pendulum Swings: Lean forward and let your injured arm hang freely. Gently swing it in small circles (both clockwise and counterclockwise), and in forward-backward and side-to-side patterns. Use gravity, not muscle effort. 2 sets of 20 revolutions each direction, twice daily.
- Passive Shoulder Flexion: Lie on your back and use your good arm to gently raise the injured arm overhead and back down, going only as far as is comfortable. 2 sets of 15 reps.
- Cervical Neck Rolls: Gently roll your neck from side to side to release the trapezius and neck muscles, which almost always tighten in compensation for a shoulder injury.
Phase 2: Strengthening (Sub-Acute Phase, with PT Guidance)
As pain and inflammation decrease, begin loading the muscles that support the shoulder. These exercises can often be performed while wearing your brace for the first few weeks.
- Isometric Shoulder External Rotation: Stand with your elbow at 90 degrees and your forearm pressed against a wall. Push outward gently without moving. Hold for 5–10 seconds, 3 sets of 10. This engages the infraspinatus and teres minor with zero joint movement.
- Isometric Shoulder Internal Rotation: Same position, but push inward. Engages the subscapularis.
- Scapular Retractions: Sit or stand tall and squeeze your shoulder blades together for 5 seconds. Release and repeat 15 times. This strengthens the rhomboids and lower trapezius, which are essential for proper shoulder blade positioning.
- Resistance Band External Rotation: Using a light resistance band anchored at elbow height, rotate your forearm outward while keeping your elbow pinned to your side. 3 sets of 15 reps. This is the cornerstone of most rotator cuff rehabilitation programs.
- Resistance Band Shoulder Rows: Anchor the band and pull it toward your torso, driving your elbows back and squeezing the shoulder blades. Builds mid-back and posterior shoulder strength.
If you’re interested in how elite athletes approach structured shoulder and fitness training, our breakdown of the Chris Evans Captain America workout protocol shows how progressive resistance training and injury prevention are systematically structured. Similarly, Henry Cavill’s Superman training approach offers insights into building shoulder resilience at higher levels of performance.
Phase 3: Return to Function (Advanced Recovery)
Once cleared by your healthcare provider, gradually reintroduce more demanding activities. The brace may be worn during this phase only for high-load activities.
- Dumbbell Lateral Raises (light): Start with 2–3 lbs and build slowly over weeks, not days. Never raise above shoulder height initially.
- Push-Up Progressions: Begin with wall push-ups (minimal load), progress to incline push-ups, then floor push-ups over several weeks.
- Cable Face Pulls: An excellent exercise for shoulder health that strengthens the often-neglected external rotators and rear deltoids simultaneously.
Complete Shoulder Recovery Guide: Beyond the Brace
A shoulder brace is one tool in a larger recovery toolkit. Maximizing your recovery requires attention to multiple areas simultaneously.
Sleep Position for Shoulder Recovery
How you sleep can significantly affect your shoulder recovery — for better or worse. Poor sleep position is one of the most common reasons people plateau in their recovery progress.
- Best position: Sleep on your back with a small pillow tucked under the injured shoulder for gentle elevation. This reduces compression on the joint and maintains a neutral position overnight.
- Second-best: If you must side-sleep, sleep on the uninjured side and hug a pillow to support the injured arm in front of you.
- Worst position: Sleeping directly on the injured shoulder — this compresses the bursa and rotator cuff tendons for hours, prolonging inflammation and pain.
If sleep quality is suffering due to shoulder pain, addressing it is a legitimate part of recovery. Poor sleep impairs tissue healing, increases inflammation, and reduces pain tolerance, creating a negative feedback loop. Our guide on 5 bedtime habits to improve sleep quality has practical strategies that can meaningfully support your recovery.
Nutrition for Tissue Repair
The body heals on the raw materials you give it. Certain nutrients are particularly important for connective tissue repair:
- Protein: Tendons and muscles are made of protein. Adequate protein intake (0.7–1.0g per pound of body weight per day for active individuals) is non-negotiable during recovery. Our whey vs. plant protein comparison can help you optimize your protein sources.
- Vitamin C: Essential for collagen synthesis — the protein that makes up tendons and ligaments. Citrus, bell peppers, and strawberries are excellent sources.
- Omega-3 Fatty Acids: Found in fatty fish, walnuts, and flaxseed, omega-3s have well-documented anti-inflammatory properties that can reduce joint pain and swelling.
- Collagen Peptides: Some research suggests supplementing with collagen peptides, timed around exercise, may enhance connective tissue repair. Discuss with your doctor.
- Magnesium: Supports muscle function and sleep quality, both of which are critical during recovery. Leafy greens, nuts, and seeds are good dietary sources.
- Anti-inflammatory foods: Turmeric (curcumin), ginger, and dark leafy greens have natural anti-inflammatory properties. Our guide on vitamins and supplements for recovery explores this in more depth.
Equally important is what to avoid during recovery: excessive alcohol (impairs tissue healing), processed foods high in refined sugar and omega-6 fats (promote inflammation), and inadequate hydration (tendons and joints rely on good hydration for their mechanical properties).
If meal prep during recovery feels overwhelming, our guide to planning healthy meals on a budget can simplify your approach, and our quick and healthy weeknight dinner ideas make it easy to hit your nutritional targets even on hard days.
Managing the Mental Side of Recovery
A long-term injury is not just a physical challenge — it’s a mental and emotional one. Frustration, loss of identity (especially for athletes), and anxiety about re-injury are completely normal. Ignoring these aspects of recovery can actually slow your physical healing, as chronic stress elevates cortisol, which impairs tissue repair and increases pain sensitivity.
Some strategies that genuinely help:
- Set process goals, not outcome goals. Instead of “I want to be pain-free in 6 weeks,” focus on “I’ll do my PT exercises every morning.” Process goals are within your direct control.
- Stay connected to your activity in alternative ways. If your injury stops you from playing a sport, can you coach, watch, or analyze the sport instead? Maintaining the connection reduces the sense of loss.
- Use a structured daily routine. Injury disrupts routine, and routine disruption increases psychological distress. Our morning routine checklist for success can help you build consistent structure around your recovery protocol.
- Consider mindfulness and stress reduction. Research shows that mindfulness-based stress reduction (MBSR) can meaningfully reduce chronic pain perception. Apps like the ones compared in our Headspace vs. Calm vs. Insight Timer comparison are a practical starting point.
Finally, if you find that negative self-talk is becoming a significant obstacle — “I’ll never recover,” “I’m weak,” “I should have been more careful” — it’s worth addressing directly. Our guide on where negative self-talk comes from and how to stop it offers actionable strategies.
Postural Habits to Protect Your Shoulder During Recovery
Poor posture is one of the most overlooked contributors to ongoing shoulder problems. When you slouch — shoulders rounded forward, head jutting forward — the supraspinatus tendon gets compressed under the acromion with every arm movement, preventing the bursa and tendons from healing properly. This is called “shoulder impingement syndrome,” and it’s directly made worse by poor posture.
- Set a timer to check your posture every 30 minutes when sitting at a desk
- Adjust your workspace ergonomics: monitor at eye level, keyboard at elbow height
- Strengthen the muscles that hold good posture: mid-trapezius, rhomboids, deep cervical flexors
- Sleep with a pillow that maintains a neutral cervical spine
If you work from home, proper desk setup is particularly important for shoulder health. Our best desk accessories guide covers ergonomic upgrades that reduce postural strain, and our review of the Steelcase vs. Herman Miller chairs covers how ergonomic seating can reduce the strain on your shoulder and upper back during long work sessions.
When to See a Doctor: Red Flags You Should Never Ignore
While many shoulder issues can be managed conservatively with bracing and physical therapy, certain symptoms indicate more serious pathology that requires prompt medical evaluation. Do not attempt to manage these symptoms with a brace alone:
- Sudden, severe pain after a specific injury event (especially after a fall or direct blow) — may indicate fracture or complete tendon rupture
- Visible deformity of the shoulder — AC joint separation, dislocation, or clavicle fracture
- Complete inability to raise the arm — may indicate a complete rotator cuff tear requiring surgical repair
- Numbness, tingling, or weakness radiating down the arm — may indicate cervical nerve compression or thoracic outlet syndrome
- Significant swelling, warmth, and redness without a clear injury mechanism — may indicate infection or inflammatory arthritis
- Shoulder pain that doesn’t improve after 2–4 weeks of conservative management
- Pain at night that wakes you from sleep and is not improving — may indicate a rotator cuff tear or, in rare cases, a tumor
💡 Pro Tip: When you see your doctor, come prepared. Write down the specific mechanism of injury (how it happened), when the pain started, where exactly it hurts (a diagram helps), what makes it better or worse, and any previous shoulder injuries or surgeries. This information dramatically speeds up the diagnostic process and helps your doctor recommend the right imaging and treatment.
What to Expect from a Doctor’s Visit
For a shoulder complaint, a physician will typically perform a physical examination that includes several specialized tests to identify the injured structure. Common tests include the Neer impingement sign, the Hawkins-Kennedy test (for rotator cuff), the O’Brien test (for labrum and AC joint), and the apprehension test (for instability/dislocation history).
Based on the examination, your doctor may order imaging:
- X-Ray: Rules out fractures and looks at bone spurs, AC joint spacing, and joint degeneration
- MRI: The gold standard for visualizing soft tissue — tendons, labrum, cartilage, and the extent of any tears
- Ultrasound: Dynamic imaging that can assess the rotator cuff in real-time during movement, and is increasingly used for guided injections
- CT Scan: Used when detailed bone anatomy is needed, particularly for fracture evaluation or surgical planning
Frequently Asked Questions (FAQ)
No. This is the most important concept to understand. A shoulder brace is a tool to manage symptoms and provide support during healing. It does not “fix” the underlying injury. True recovery comes from a comprehensive plan prescribed by your doctor or physical therapist, which may include rest, specific therapeutic exercises, manual therapy, and other treatments. The brace is just one part of that plan — supportive scaffolding, not structural repair.
You should follow the advice of your medical provider. Generally, it is not recommended to wear a brace 24/7 unless specifically instructed (e.g., immediately post-surgery). Over-reliance on a brace can lead to muscle weakness (atrophy) as your stabilizing muscles become dependent on the external support rather than doing the work themselves. Typically, braces are worn during activities that stress the shoulder or for specific periods to manage pain, with progressive weaning as recovery advances.
Consult your doctor or physical therapist first. For some conditions or immediately post-surgery, wearing a brace or sling overnight may be required or recommended. For many common strains and tendon issues, sleeping without a brace is preferable — the skin needs to breathe and the muscles need unobstructed blood flow during the night’s recovery window. If the goal is to control your sleeping position to protect the shoulder, your doctor might recommend a specific abduction pillow or positioning wedge rather than an active compression brace.
It depends entirely on the exercise and your stage of recovery. A shoulder brace is appropriate during light, PT-prescribed exercises to protect the joint during early rehabilitation. However, you should not use a brace as a way to continue performing exercises that are causing significant pain — pain during exercise is a signal that the tissue is being overloaded. A good guideline: if you wouldn’t feel safe doing an exercise without the brace, you probably shouldn’t be doing it at all yet. Always get your exercise program cleared by your physical therapist.
A shoulder brace (also called a stabilizer brace) wraps around the shoulder joint and upper arm/chest to provide compression and partial movement restriction while still allowing functional use of the arm for daily tasks. A shoulder sling supports the weight of the entire arm from below, keeping the elbow bent and the arm close to the body. Slings are used for maximum immobilization — fractures, post-surgical repairs, or severe dislocations — where the goal is to completely rest the joint and eliminate all gravitational load on it. Slings provide immobilization; braces provide stabilization.
Healing timelines vary enormously depending on the type and severity of the injury, your age, overall health, nutrition, and consistency with your rehabilitation program. As a very rough guide: mild rotator cuff strains and Grade I tendonitis may resolve in 4–6 weeks; moderate strains and bursitis typically take 6–12 weeks; Grade II-III AC joint sprains can take 3–6 months; and partial rotator cuff tears may take 4–6 months of consistent rehab. Surgical repairs have much longer timelines — 6–12 months is common for rotator cuff surgery. A brace is a support tool, not a healing accelerant; the exercises and rest you pair it with determine the actual speed of your recovery.
Postural braces exist (often called posture correctors) that pull the shoulder blades back and encourage thoracic extension. These can provide short-term relief and proprioceptive awareness. However, relying on a posture brace rather than strengthening the underlying postural muscles creates the same dependency problem as any other brace: when you take it off, the problem returns because nothing has actually gotten stronger. The better long-term investment is targeted strengthening of the mid-back and rotator cuff muscles, combined with ergonomic workspace changes. A posture brace can be a useful short-term training aid but should not be worn all day indefinitely.
The classic guidance is: ice for acute injuries, heat for chronic conditions. In the first 48–72 hours after an acute injury or after any activity that flares up the shoulder, apply cold (wrapped ice pack or frozen gel pack, 15–20 minutes, never directly on skin) to reduce swelling and numb pain. After the acute inflammatory phase has passed, heat (warm compress, heating pad, or warm shower) is more effective for relaxing stiff, chronically painful muscles and increasing blood flow to facilitate healing. Many people with tendonitis and bursitis benefit from heat before exercise (to loosen the joint) and ice after exercise (to dampen any post-activity inflammation). The NatraCure brace reviewed above makes this dual-therapy approach particularly convenient.
This depends on the brace type and which shoulder is injured. If the brace significantly restricts your ability to turn the steering wheel, reach the gear shift, or perform emergency maneuvers, driving is unsafe regardless of legality. A mild compression sleeve typically does not impair driving ability. A moderate stabilizer brace may restrict range of motion enough to create a safety issue, particularly for parallel parking or tight maneuvers. Driving with your shoulder in an immobilizer sling is generally unsafe and may be illegal in your jurisdiction. Consult your doctor — they can provide medical guidance on when you can safely return to driving, which matters both for safety and insurance purposes. For broader vehicle safety habits during physical recovery, see our guide to safe driving practices.
These terms are sometimes used interchangeably but describe different levels of injury. A strain involves overstretching or micro-damage to the muscle fibers or tendon without a significant structural disruption — think of it as a bruise to the tendon. A tear means the tendon has actually split, either partially (partial-thickness tear) or completely (full-thickness or “complete” tear, where the tendon is entirely detached). Strains typically heal well with conservative management. Partial tears may also heal conservatively with sufficient time and rehabilitation, though this depends on the tear size and location. Complete tears in active individuals often require surgical repair, especially if the person wants to return to overhead activity or sport. An MRI is needed to distinguish between these diagnoses accurately.
Conclusion: A Tool for a Guided Recovery
A shoulder injury can feel isolating and overwhelming, but with the right approach it is entirely manageable. The key insight to carry with you is this: a shoulder brace is a supportive aid, not a cure. Its purpose is to provide stability, compression, and pain relief that creates the protected environment your shoulder needs to engage in the real work of recovery — the exercises, the rest, the nutrition, and the professional guidance that together drive genuine healing.
The best results always come from combining the right support with dedicated physical therapy and medical guidance. After speaking with your doctor and confirming the right level of support for your injury, you can confidently choose a brace like the versatile Babo Care Brace for all-around, adjustable stabilization or the NatraCure Brace for excellent pain and inflammation management. Used correctly and consistently as part of a comprehensive rehabilitation program, either brace can be a genuinely valuable partner on your road back to full strength, comfort, and function.
Remember to address the full picture of your recovery: sleep quality, nutrition, posture, mental health, and progressive exercise. Recovery is not just about the shoulder — it’s about the whole person. Take care of yourself, follow your healthcare provider’s guidance, and trust the process.
📌 Related Reading: If you found this guide helpful, you may also enjoy our guides on improving sleep quality during recovery, optimizing protein intake for tissue repair, vitamins that support focus and recovery, and the ultimate self-care checklist for busy professionals managing an injury while staying productive.